Crafted with Love: Discovering the Inspirations behind 1212craft Cup Collection

Today, I would like to take a moment to gently look into the details of creating this collection and share the inspirations behind their names and some highlight of the cups, which I learned a lot during the creation process of my first collection. I am hoping this story brings you some joy during your radiant weekend.
Naming - ROLO
Naming my cups would facilitate communication and enhance the purchasing experience with my customers. Initially, I contemplated naming the first collection of eight cup and saucer sets after different city names, reflecting places I have visited or wish to explore. For instance, one of the designs was initially referred to as 'Tokyo' in my logbook, inspired by the majestic beauty of Mount Fuji. However, I realized that this approach might not resonate with everyone. To foster better association and recognition, I decided to name each design based on its unique shape, form, or memories associated with it, such as the delight of enjoying Rolo chocolate during my childhood. This is how I have named my entire collection.
Planning - BUKI
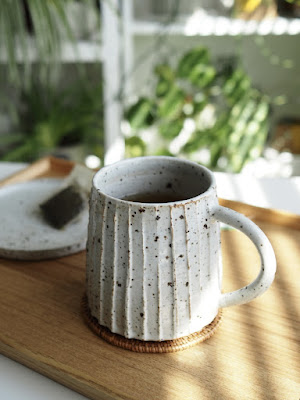
Temperature and humidity play a crucial role in the planning and scheduling process, affecting the ease and smoothness of creating pottery pieces, especially when working in a shared studio with limited time slots. To make the most of my studio time, I do all the wheel throwing there and carefully pack my unfinished pieces to bring them back home. I store them in my garage, which provides lower and more stable temperatures, allowing me to wait for the next step. I couldn't agree more that the ideal stage for editing the clay is when it reaches the leather-hard state. During this golden time, I can easily attach handles or add decorative elements. However, I faced a setback when I tried to catch up with my schedule on BUKI, a bucket-like design. The clay was still wet and soft, making carving more challenging. The first attempt failed as I held the piece in my left hand and used my right hand to handle the carving tool, resulting in a distorted shape. It taught me the importance of waiting for the second piece to be ready. This time, I placed it on a sculpting wheel and used a ruler as a guide to carve straight-line patterns, preventing any deformations.
Trimming - KIVI
Among the collection, KIVI holds a special place as my personal favorite due to its unique round bottom, which presents a trimming challenge. Before I start working with the clay on the wheel, I visualize a pre-demonstration of each design in my mind. With my past experiences in mug-making, I've come to realize that achieving a rounded shape at the lower part of the cup is no easy task.
To accomplish this, I begin by creating a round bottom on the inner base of the cup before pulling the clay upwards on the wheel, using a technique similar to making a bowl. I then allow the clay to reach the leather-hard stage. Next, I trim the bottom of the cup by placing it upside down on the wheel as usual. Carefully using 1-2 different trimming tools to remove excess clay, ensuring that the outer curve matches the inner curve I established from the beginning. This not only ensures uniform thickness throughout the cup but also provides space for later carving.
This particular step demands exceptional attention and time, as any errors in trimming can render all previous efforts futile. It is crucial to strike the right balance and avoid over- or under-trimming
Glazing - ALMOND
I added a touch of personality to ALMOND by employing a subtle glazing technique. After dipping the entire cup in glaze, I set it aside to dry for a while. Then, using a damp sponge, I delicately remove the glaze from the surface, revealing the original rustic texture of the clay. All of my cups in this collection are glazed in my favorite color, white. Its clean and minimalist appearance makes it versatile and suitable for any style of space. I consider it a blank canvas, brimming with creative possibilities for my future projects.
I want to have my own pottery wheel or studio someday in the future, but I treasure what I have learned from the talented people in a shared pottery studio, and I am happy to share more details with all of you. To give you some ideas of my pottery-making process behind these cups, I've attached photos from my digital pottery logbook, which captured some rough sketches and notes that were incredibly helpful throughout this project. Thanks for stopping by. Stay tuned for the following updates.
WM


留言
發佈留言